When hosting a webinar, there always is the fear of not knowing if things will work properly. And honestly, it’s completely normal to feel this way — especially when you know that there are 100 (or more!) people waiting to see you present. The pressure of performing well is high, and the last thing you want is for something to go wrong technically.
So, what’s the biggest concern for most webinar hosts? You guessed it — it’s the fear that your microphone or camera won’t work during the session. After all, these are your main tools for communicating with your audience. If your mic cuts out or your video freezes, it can quickly turn a smooth presentation into a stressful mess.
But here’s the good news: With the right preparation, you can avoid these technical hiccups altogether. Based on our experience, we’ve collected the best tips and tricks to make sure everything works like a charm during your webinar. And the best part? We’ve broken it down into 4 simple steps to test your microphone and camera, so you can be 100% sure that everything is set up properly before the webinar even begins.
But that’s not all! At the end of this article, we’ll also show you how to test your internet speed, along with some additional troubleshooting tips to ensure that, no matter what, you’re ready to host your webinar without any unexpected surprises.
4 simple steps to test your microphone and camera
Before your webinar, it’s important to make sure your microphone and camera are working properly. Here are 4 simple steps to help you test everything in advance and avoid any technical issues during your session.
- Use a test room
- Run a rehearsal webinar
- Run an online camera and microphone test
- Run an internet speed test
Why you should test your camera and microphone
Great audio and video will make you look more professional
Having clear audio and sharp video isn’t just about avoiding distractions — it’s about presenting yourself in the best possible light. When your microphone and camera work well, you’ll look polished, confident, and credible.
This not only helps keep your audience engaged, but it also creates a more positive impression of you as a presenter.
A professional look helps you build brand authority
When you present yourself clearly and professionally, it sends a message that you take your work seriously. Whether you’re hosting a product-demo webinar, sharing expert insights, or teaching a class, high-quality audio and video give your brand a level of authority and trustworthiness that will make your audience more likely to value what you’re saying.
A smooth, professional experience helps you build credibility and trust with your audience.
You’ll avoid technical problems that could cause people to stop watching
Technical glitches like poor sound, fuzzy video, or delays can be frustrating for your viewers and can cause them to lose interest quickly. By testing your microphone and camera beforehand, you can avoid these issues altogether, keeping your audience engaged and ensuring that your message is heard loud and clear.
The smoother your webinar runs, the more likely your audience is to stay with you until the end.
1. Use a webinar test room / backstage
Before you hit "start" on your webinar, it’s important to make sure everything is working smoothly. That’s where the test room (or backstage) comes in.
Many modern webinar platforms, like Contrast, offer this feature. Think of it as a private "green room" where you can prepare before going live. In the test room, you can check your microphone, camera, lighting, and even your internet connection — all without your audience seeing anything. It's basically a trial run.
You can use this time to:
- Test your audio and video: Make sure your mic is clear and your camera is showing the right angle.
- Check your internet connection: Ensure you have a stable connection so there’s no lag or disruption during the actual webinar.
- Prepare content: Get ready with your slides or materials before you go live, and make sure they’re working correctly.
By using the test room, you can avoid last-minute technical glitches and ensure your webinar starts smoothly.
Run More Engaging Webinars
Start for free up to 30 registrants. No credit card needed.
Start for freeHow to test your camera and microphone using the backstage
For this to work, most platforms require you to create a new webinar. From here, you'll find a link to the webinar room. On Contrast, this is called "Enter Studio".
After clicking on that, you'll land here. As you can see, my cam and mic are not being used yet.
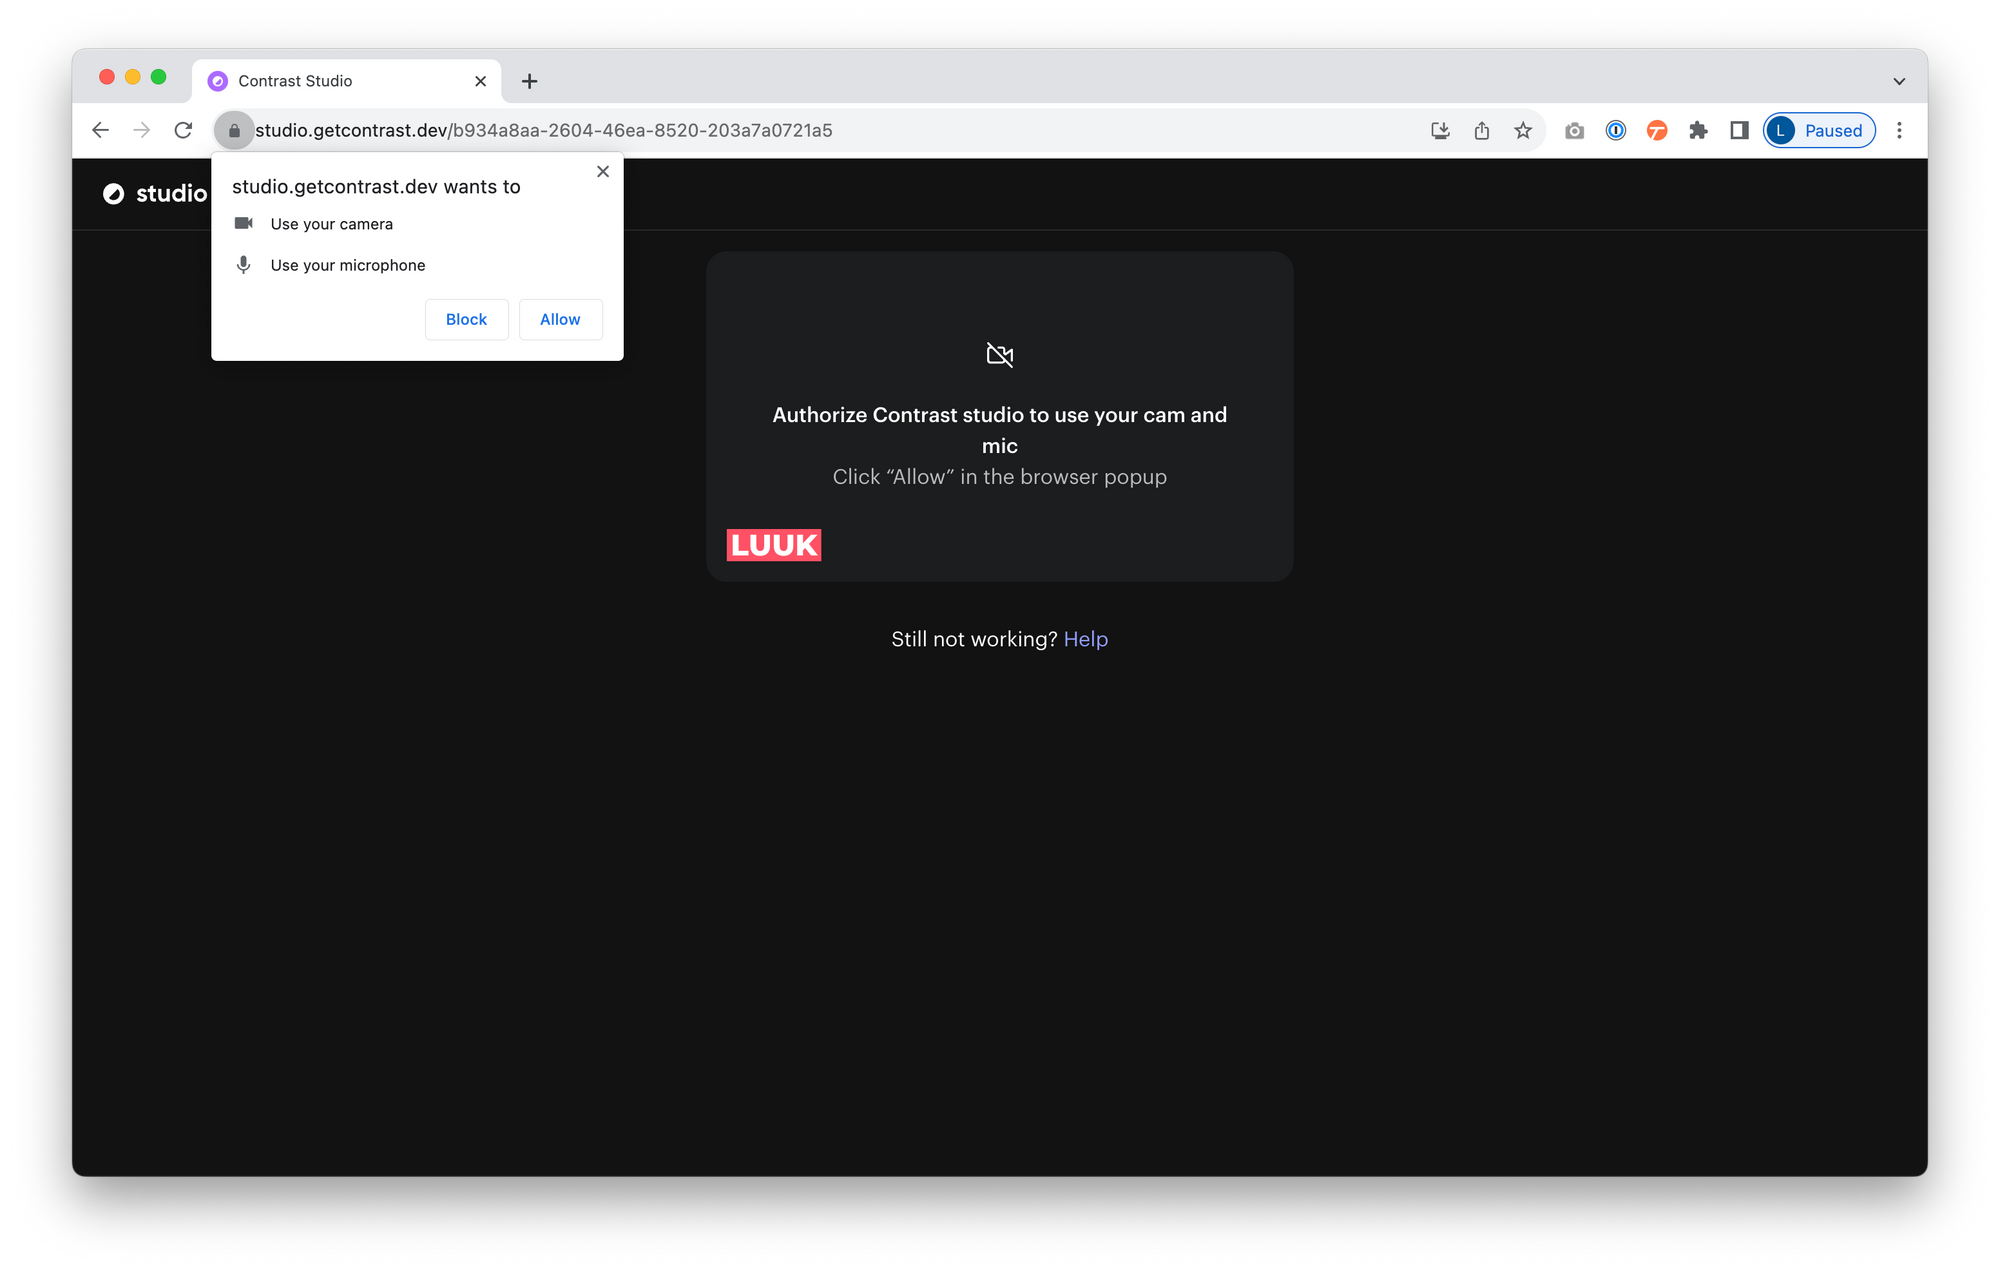
Now the first thing to do is to give permissions to your browser to use both the camera and microphone on your computer. We recommend you to use Chrome, and if you're having trouble – this is how it works.
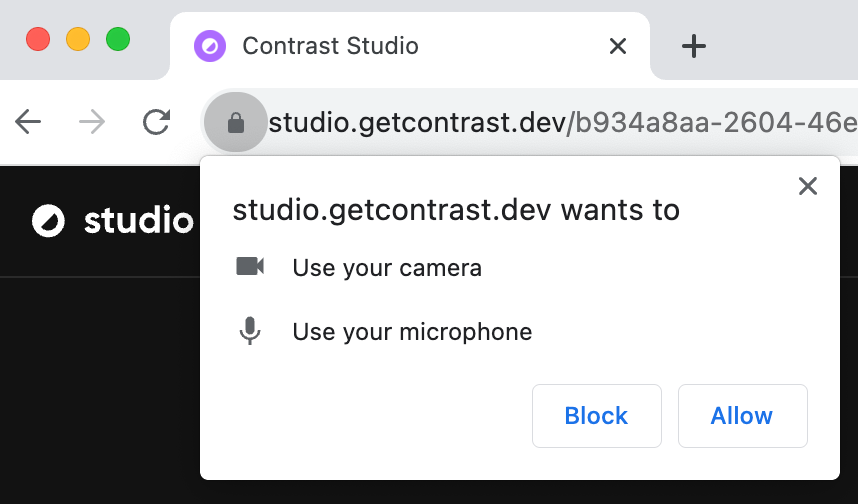
After giving permissions, you should be able to see yourself. Also, your microphone should be working now. See how my MacBook's built-in microphone has been detected?
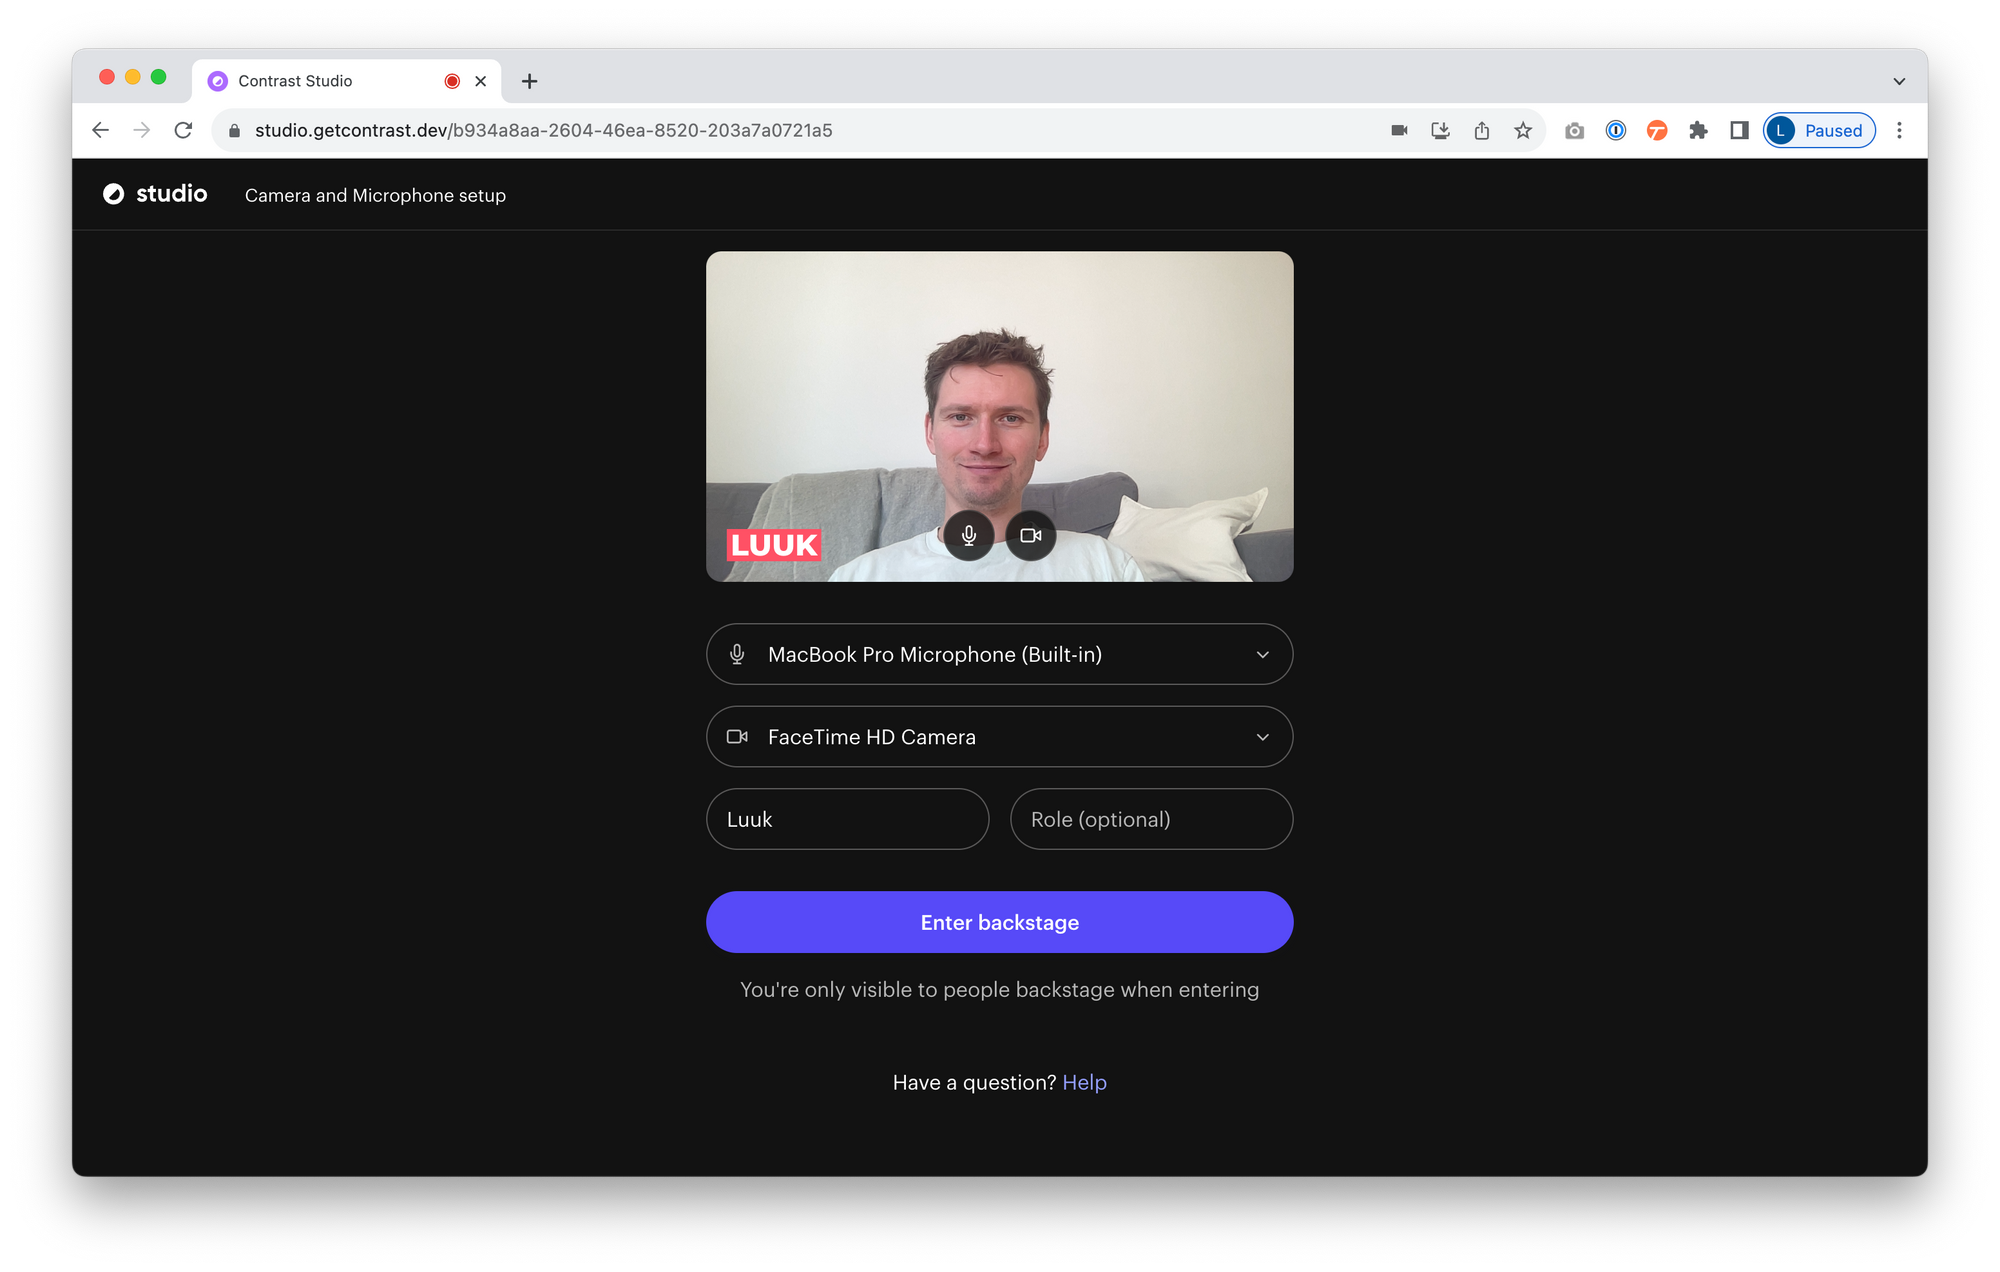
Now you can enter the webinar room as a backstage participant. If you're here with others, add yourself to stream (off the backstage). Now you can see and talk with the other people in your webinar.

2. Run a test or rehearsal webinar with colleagues
The safest way to ensure everything runs smoothly is by doing a rehearsal webinar with your colleagues and any external speakers. This gives everyone a chance to test out their roles, equipment, and presentation before the real event.
Why is this so important? Well, things can go wrong during live webinars — from microphone issues to software glitches to miscommunication with speakers. A rehearsal helps you catch these problems early, before they affect your audience. Plus, it helps everyone feel more confident and prepared.
However, some webinar platforms charge extra for additional speakers or participants, and this can add up if you’re doing multiple tests. This is where a platform like Contrast comes in handy. With Contrast, you don’t get hit with extra costs for having multiple speakers or testers. You can run as many rehearsal webinars as you need without worrying about the price.
Here’s how to make the most out of your rehearsal:
- Duplicate your actual webinar: This way, you’ll be working with the same setup — same slides, same software, same format — so you know exactly what to expect on the day of the live event.
- Test speaker roles and transitions: Ensure everyone knows when they’ll speak and how to transition smoothly between presenters.
- Check the flow of the content: Make sure the timing works out, and the tech is in place to handle everything from slides to videos to polls.
- Test interactive elements: If you’re planning to use polls, Q&A sessions, or other interactive features, rehearse those too.
Once the rehearsal is done, you’ll feel ready for anything that comes up during the live event!
You can use the template below to invite your colleagues or guest speakers to your rehearsal webinar. It's a simple way to get everyone on the same page before you go live.
Thank you again for speaking at our event on {date, time}.
To make sure that everything goes as planned, we're organizing a rehearsal webinar where you can make sure your everything is working correctly.
The rehearsal takes place on {date, time}. You can join us using this link {link to webinar studio}.
We recommend you to use Google Chrome and a steady internet connection. If you're having trouble using your webcam or microphone, you can use this article to troubleshoot: https://support.google.com/chrome/answer/2693767?hl=en&co=GENIE.Platform%3DDesktop
Looking forward seeing you there!
Run More Engaging Webinars
Start for free up to 30 registrants. No credit card needed.
Start for free3. Run an online camera and microphone test
If your webinar platform doesn’t offer a built-in backstage or test environment, don’t worry! There are simple tools you can use to make sure your camera and microphone are set up correctly before going live.
One tool we recommend is the pre-call test from Vonage. Vonage is a video infrastructure provider, and their test tool is super quick and easy to use. In just about 20 seconds, you’ll be able to check if your camera and microphone are working properly.
Here’s how it helps:
- Check your camera: You’ll see if the video feed is clear and if your camera is pointed at the right angle.
- Check your microphone: The tool will show if your mic is picking up sound clearly, so you can avoid audio issues when you’re live.
- Quick setup: It takes less than a minute to use, giving you time to fix any problems before your webinar starts.
Even if your webinar platform doesn’t offer a dedicated test room, using a tool like Vonage’s pre-call test gives you peace of mind that your gear is ready to go. And the best part? It’s free and can be done right from your browser!
How to start your camera and microphone test
You can ignore most of the text you see on the screen and straight click on the button Run Test. Now your browser will ask you for permissions to use your camera and microphone.
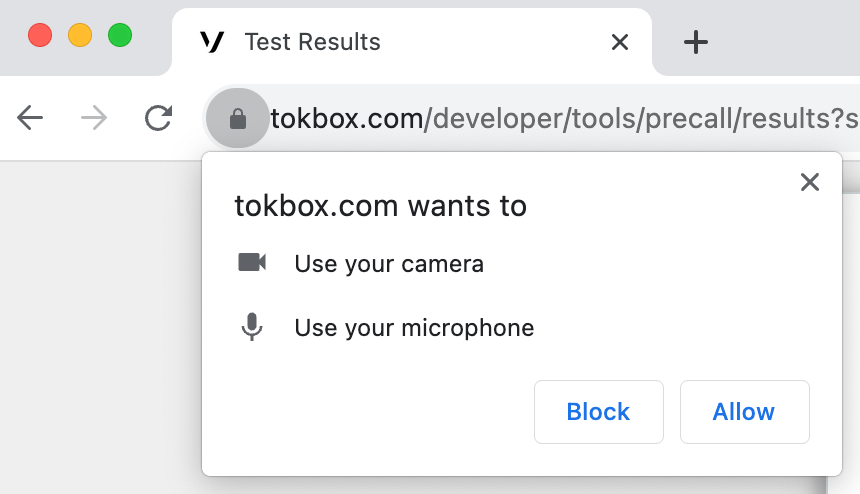
It is important you click on allow, otherwise it's not possible to test your camera and microphone.
Give the test a couple of seconds to run, in the end you'll get your summary of how things are working.
How do I know if my camera and microphone are working?
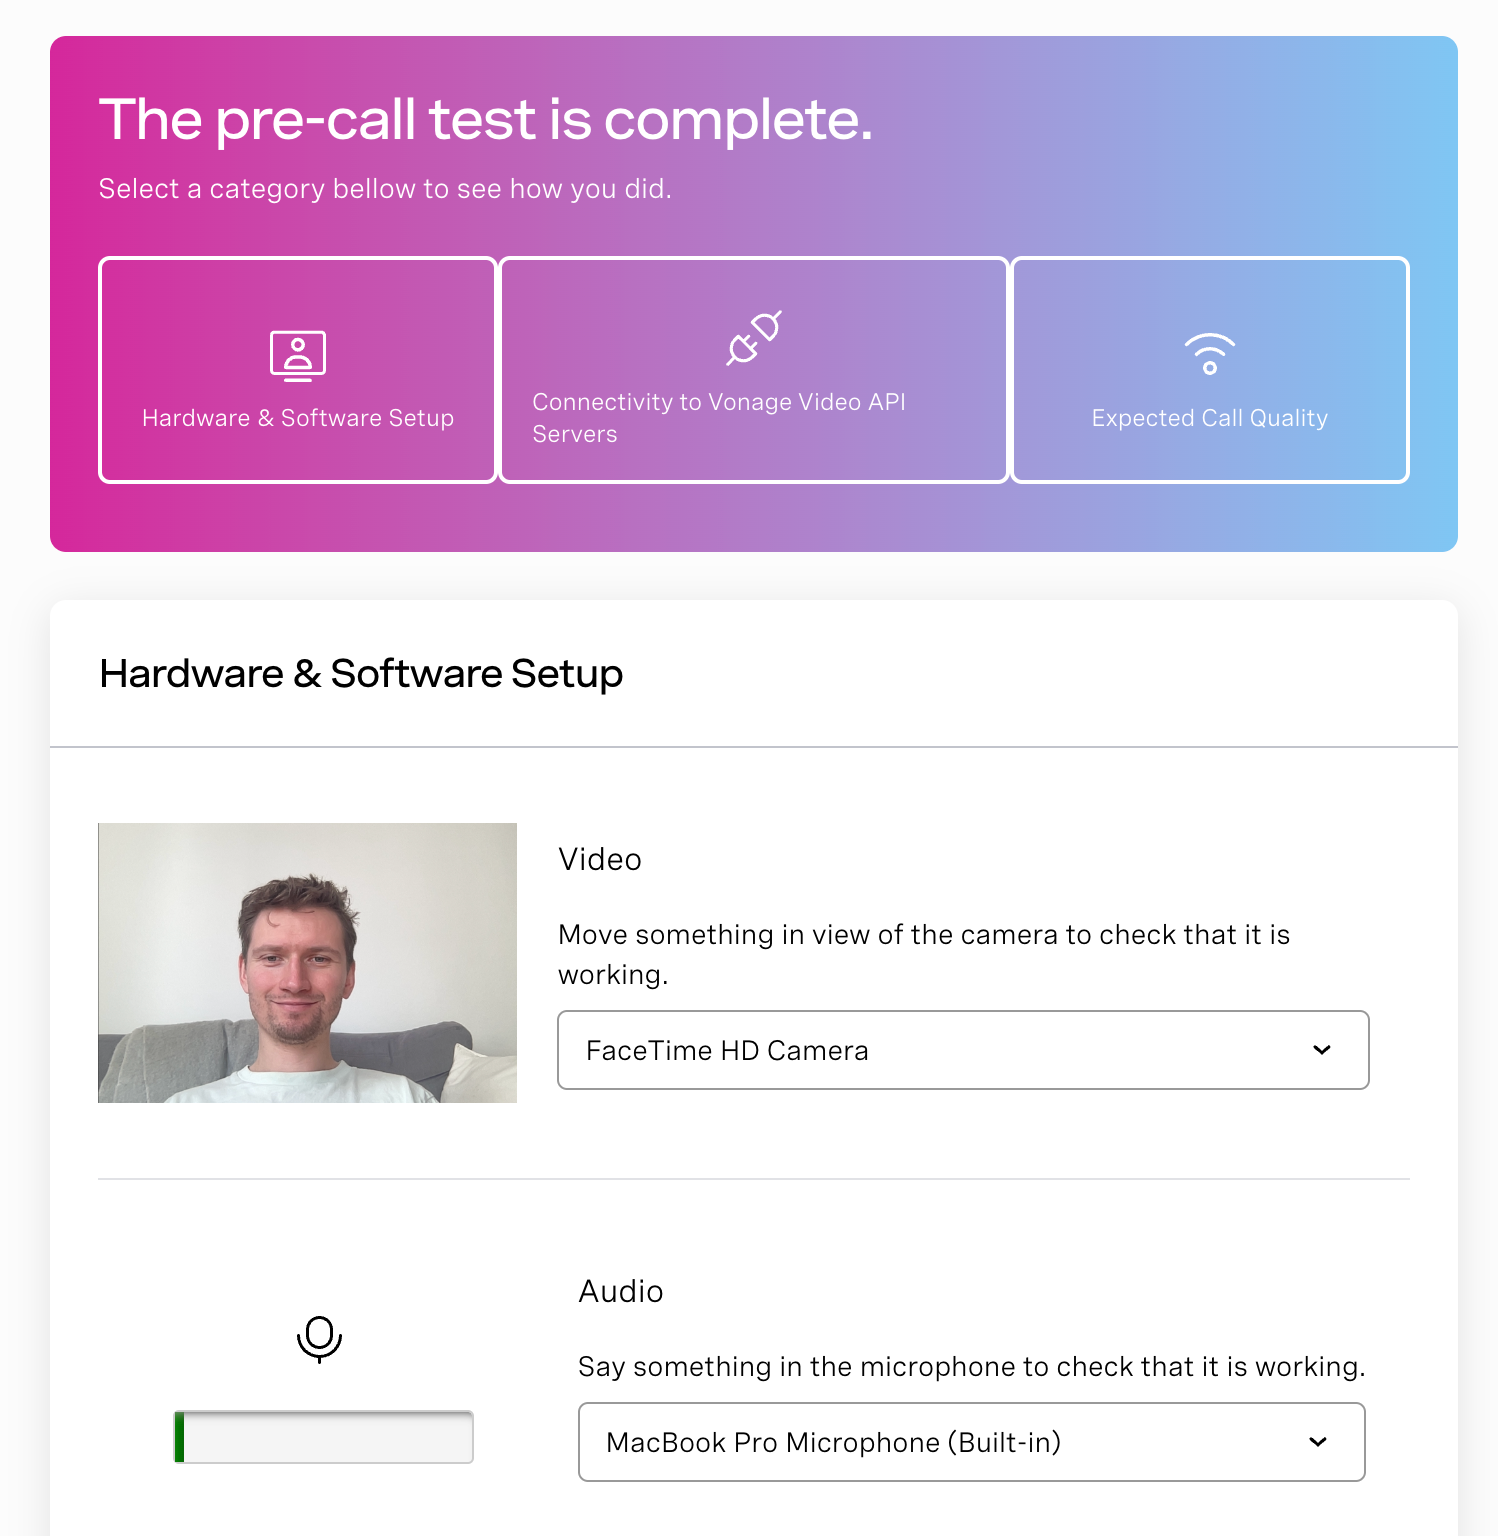
As you can see in this example, both the webcam (I can see myself) and microphone (the green bar moves when I speak) are working.
You can now confidently use your camera and microphone in your next webinar.
4. Run an internet speed test
If you’re worried about your internet connection and how it might affect your webinar, running an internet speed test is a smart move. A stable and fast internet connection is crucial for a smooth webinar experience, especially if you're using video or sharing slides and content in real-time.
Why should you run a speed test?
Running a speed test can give you more information on the quality of your internet connection. If your bandwith is low, consider moving somewhere else, or connecting to the internet via an ethernet cable.
- Avoid lag and buffering: A slow or unstable connection can cause video or audio to freeze or lag, making your webinar hard to follow for attendees.
- Ensure smooth delivery: A good internet speed means your presentation, videos, and screen sharing will load quickly and without interruptions.
- Identify problems early: If your internet speed is too low, you’ll know in advance and can take action, like switching to a stronger connection or adjusting your webinar setup.
There are different kinds of speed tests, each focusing on different aspects of your connection. We'll explain two of them to help you make sure you're fully prepared.
Run a basic speed test
The most simple one is this Speedtest by Ooka, simply click go and it will start measuring your internet's speed. Here we've to look at upload speed. It's a little more complicated than this, but in general if your upload speed is higher than 10mb per second, you're in the safe zone.
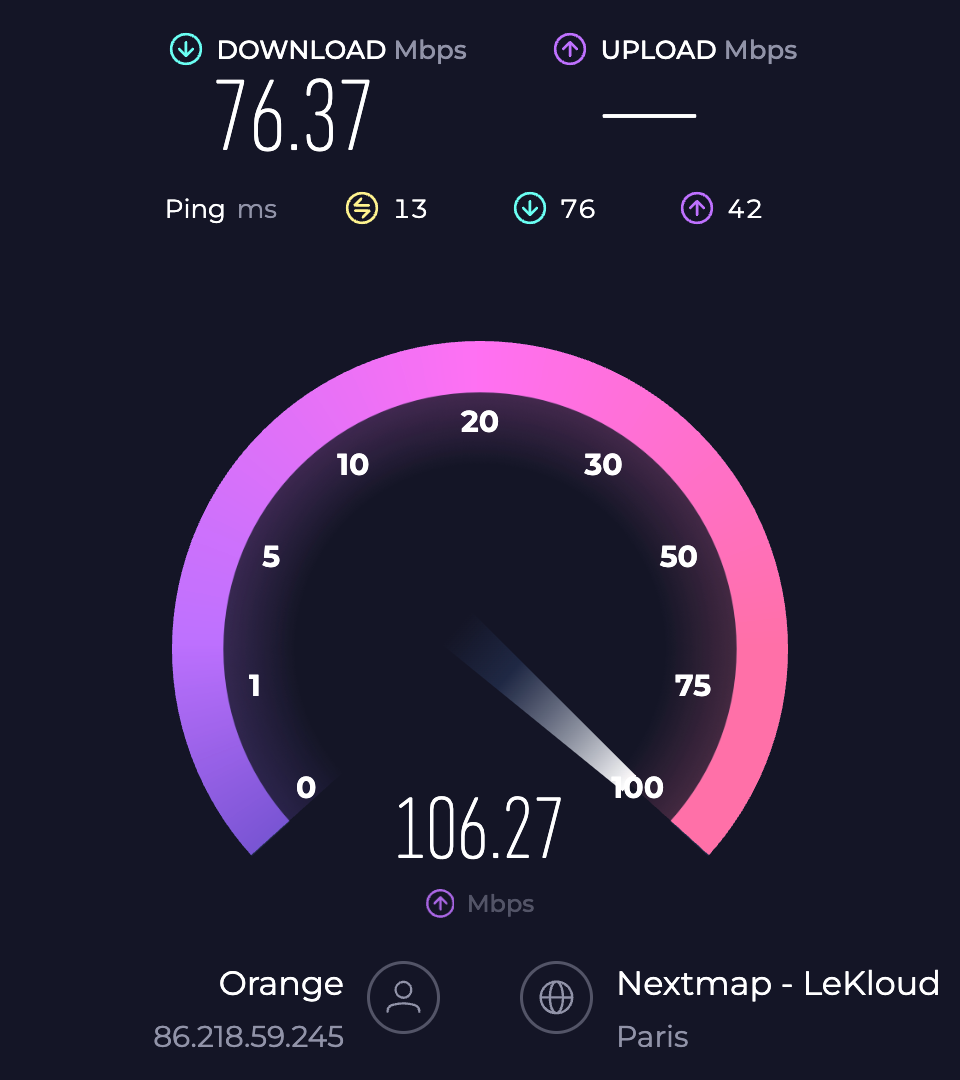
If you're not hitting the 10mbps minimum, we recommend you to move closer to your router, switch networks, use a mobile hotspot or cable if possible.
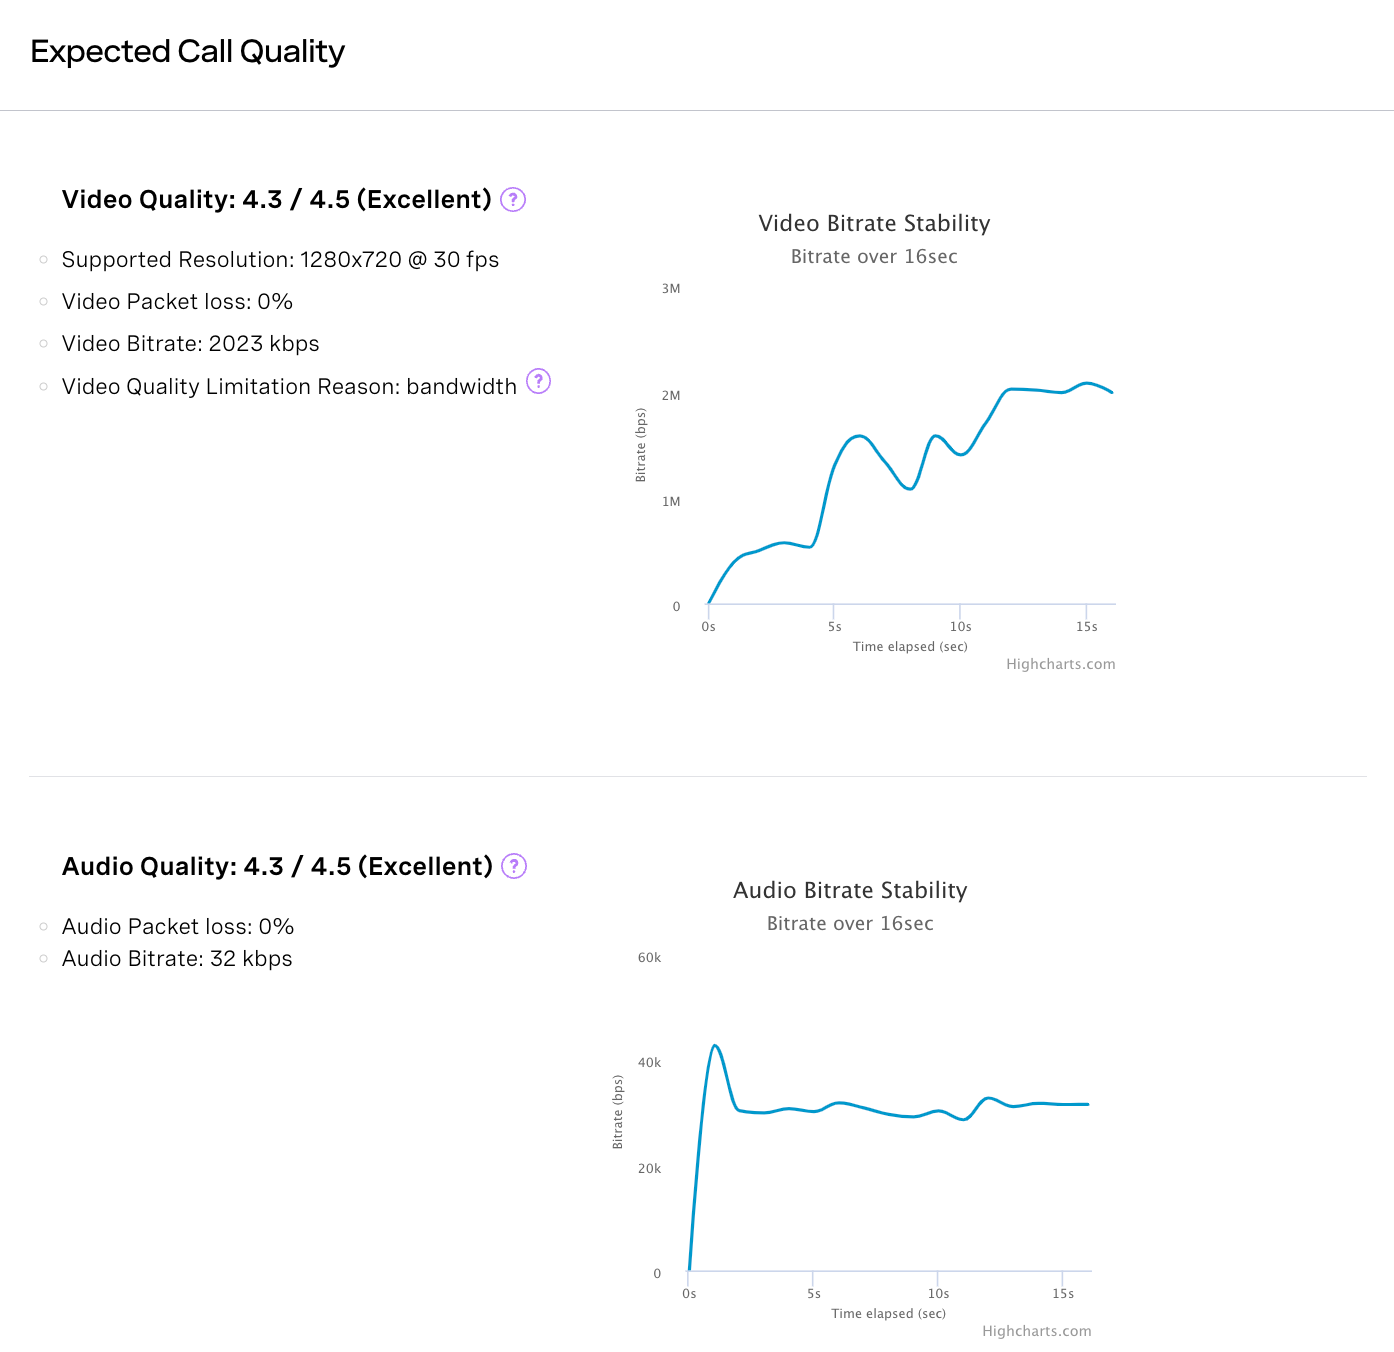
Run a detailed speed test
You can also use the pre-call test from Vonage that we recommended earlier. It will test your camera, microphone and expected quality based on your internet connection. The report looks like this.
Improve your camera and microphone quality
Perhaps your camera and microphone are working, but you're not entirely satisfied about the image quality or that of your microphone. Here are a few tips we like to share with our customers:
- Sit in a well-lit room to improve your image quality
- If you're still not happy, use a tool like Camo Studio to use your phone as a webcam
- Use earbuds to improve the quality of your microphone
We've written another article on how to further improve your camera and microphone quality without breaking the bank.
How to test your camera and microphone on 4 different platforms
How to test your camera and microphone on Windows 7, Windows 10 or Windows 11
You can use the built-in camera and microphone apps to test your devices on Windows 7, 10 or 11.
How to test your microphone on Windows
- Make sure that your microphone is connected to your computer
- Open the Start menu and select settings
- In the settings menu, select System and then choose Sound
- In the Sound settings, go to Input and select the microphone that you want to test
- The sound bar should move when you speak or make sound. If it doesn't, make sure you've updated your drivers.
Official documentation from Microsoft
How to test your camera on Windows
- Make sure that your camera is connected to your computer
- Open the Start menu and search for the 'Camera' app
- Turn on your webcam and check the image. You can also record a clip to check the audio and video quality
Official documentation from Microsoft
How to test your camera and microphone on MacOS?
You can easily test your camera and microphone on MacOS by using the pre-installed apps on your Mac. Let's learn how.
How to test your microphone on MacOS?
- Make sure your microphone is connected to your Mac
- Select the Apple icon on the top-left corner and click on System Settings
- In the search bar, search for Sound
- From the Sound menu click on Sound Input
- Check if the sound bars react to sound (like your voice)
Official documentation from Apple
How to test your camera on MacOS?
- Make sure that your camera is connected to your Mac
- Click on the Finder icon, and search for the app PhotoBooth.
- Check your image to see if your camera is working.
Official documentation from Apple
How to test my camera and microphone on Zoom?
If you're using Zoom, you can test your webcam and microphone directly from their app. We recommend to do it before joining a meeting or webinar.
How to test your microphone before joining a meeting
- Sign in to Zoom, click on your profile and now click on settings
- Click on the audio tab and follow the instructions to test your camera and microphone
How to test your webcam before joining a meeting
- Sign in to Zoom, click on your profile and now click on settings
- Click on the video tab and choose your camera and follow the instructions to test your camera and microphone.
It's also possible on Zoom to join a test meeting.
How to test my camera and microphone on Google Meets or Hangouts?
Google Meets (ex-Hangouts) has a built-in green room to test your camera and microphone.
How to test your microphone and camera using the green room
- On your computer, go to Google Meet
- Select the meeting that you want to join
- Before you join the meeting, at the bottom of the preview, you’ll find your connected cameras and microphones
- To check your audio and video, at the bottom of the preview tile:
--> Check the sound bar, it should move
--> If you see a preview of your camera, your camera works
Official documentation from Google Meets
Wrapping it up
Testing your microphone and camera before hosting a webinar is an essential step to ensure everything goes smoothly. By taking the time to check your setup ahead of time, you can avoid the stress of technical issues during the live event. Whether it’s using your webinar platform’s test room, running a rehearsal with colleagues, or using an external tool like Vonage’s pre-call test, these small steps help you ensure that your audio and video are working properly.
When you test in advance, you’re not just avoiding potential glitches, but also giving yourself the confidence to focus on delivering great content. A clear, professional presentation will help you engage your audience and keep things running smoothly, without worrying about tech problems.
Frequently asked questions
What is the best browser to host a webinar from?
We generally recommend to use Google Chrome as your main browser. Most cameras and microphones will automatically work with Chrome and you don't have to install any other software.
Also, you'll find that most webinar companies create their software to specifically work with more popular browsers like Google Chrome.
Always make sure to update your browser to ensure that you can use all its features and keep up-to-date with security updates.
How do I know if my internet is fast enough to host a webinar?
Do a speed test that will show you the speed of your internet connection. You can use a website like.
If you want to be sure your webinar will go without trouble, it's recommended that you have a speed of 10mbps or higher.
How do I use a different or external camera or microphone?
Generally most apps these days support using different or external cameras and microphones. As always, make sure your browser has access to your camera and microphone, as explain before. Then look for your settings, and look for the dropdown next to the camera/microphone label. Here you can usually select other devices that are connected to your computer.
It seems the camera/microphone on my computer is not working at all
If you have a brand-new computer, you may have to firs give permissions on your computer so that the browser can access your microphone and camera. If you're using a Mac, please read this article. Windows-users, there's this article.
Run More Engaging Webinars
Start for free up to 30 registrants. No credit card needed.
Start for free